Here is a tutorial on How to Reinstall all the Windows Default Apps with PowerShell
Some people do not like the universal apps installed by default In Windows 10 or Windows 11 and want to get rid of them. They can manually uninstall most of them using the Settings app or PowerShell. Apps like Calendar, Mail, Camera, Photos, or Candy Crush Soda Saga can be gone from a Windows 10 or Windows 11 computer in no time. So how do you get all the default apps back when you learn that you need them or when they are broken and no longer work correctly? In this tutorial, we show you how to reinstall and re-register all the default apps shipped with Windows 10 or Windows 11. Don’t worry, this is a straightforward process. Let’s get started.
NOTE: If you’ve arrived here looking for ways to uninstall Windows apps with PowerShell, check this guide instead: How to uninstall Windows apps with PowerShell.
Things you should know about reinstalling Windows apps with PowerShell
The steps in this tutorial help you reinstall all the default apps from Windows 10 or Windows 11, including the Microsoft Store. Furthermore, they also allow you to reinstall Windows apps without the Store. However, note that everything we show is tested and confirmed to work only in the latest versions of Windows 10 and in Windows 11.
If you have an older version of Windows 10, you can follow the steps we show for getting the built-in apps back, but you might not be able to also re-install the Microsoft Store. The only proven way to get the Microsoft Store back in older versions of Windows 10 to then be able to install other apps is to reinstall Windows 10.
Step 1. Open PowerShell as Administrator
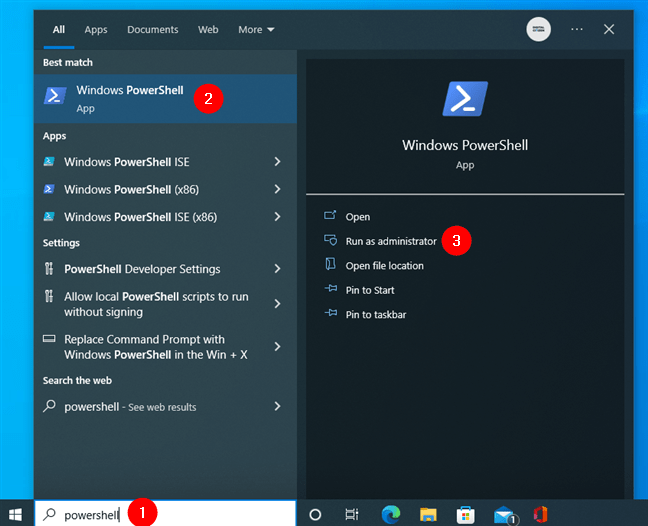
First of all, you must open PowerShell with administrative rights. The fastest way to do that in Windows 10 is to use the search bar on the taskbar. Type “powershell,” and then click or tap on “Run as administrator” on the panel to the right of the Windows PowerShell search result.
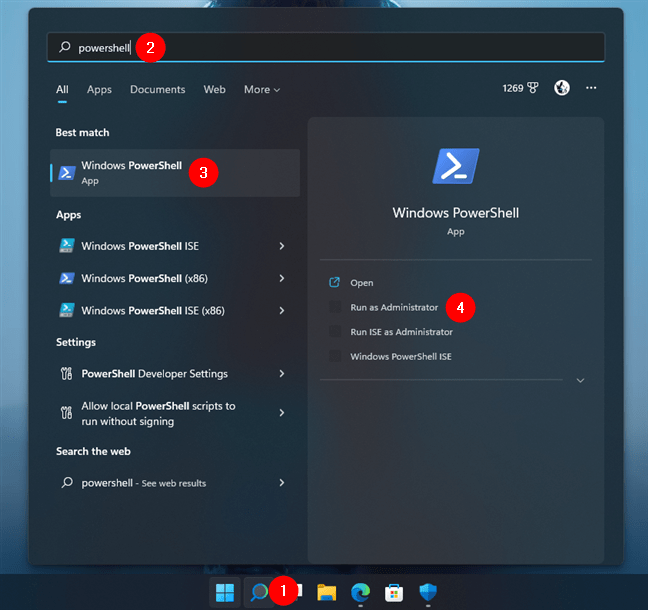
If you’re using Windows 11, press the Search button on the taskbar and type “powershell” in the search box. Then, select the Windows PowerShell result on the left and click or tap “Run as Administrator” on the right-hand panel.
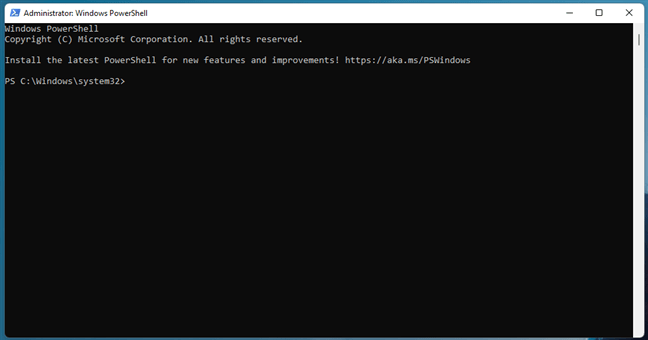
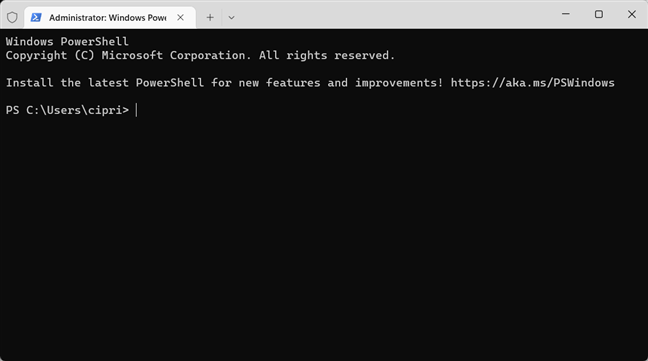
Once PowerShell is launched, you should see a window similar to this one:
Step 2. Run the reinstall and re-register command for built-in Windows 10 or Windows 11 apps
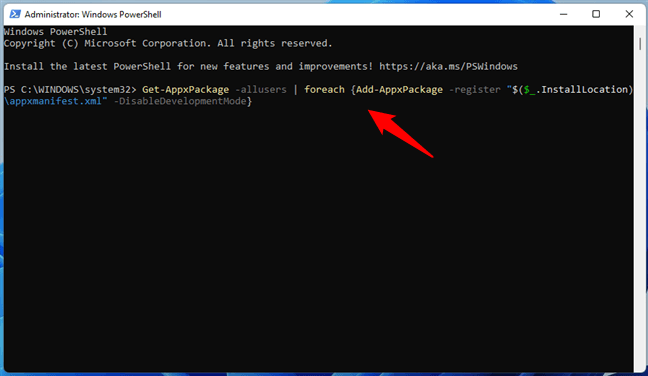
To reinstall all the Windows apps that you uninstalled over time, all you have to do is run a specific command. Type or copy-paste the following command inside your PowerShell window:
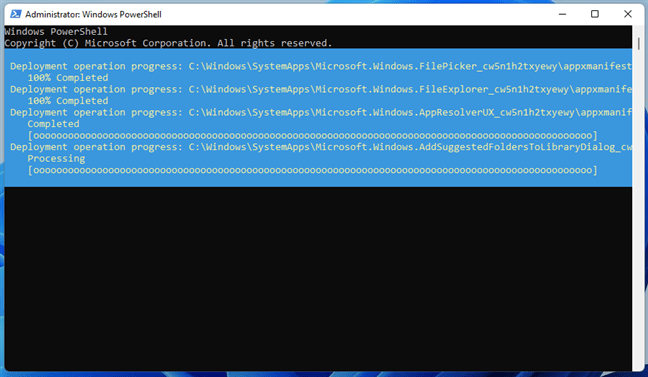
After you’ve entered the above command in PowerShell, press Enter. Then, your Windows 10 or Windows 11 PC begins reinstalling and re-registering all their default built-in apps. Note that this step might take a while, depending on the speed of your PC.
Step 3. Reboot your Windows PC
Once the command has finished running, PowerShell displays the current folder path. There are no messages or additional confirmations displayed. Close PowerShell and reboot your Windows 10 or Windows 11 PC or device. You should find all your missing Windows 10 or 11 default apps when you log in.
What if the Windows apps I reinstalled still don’t work well?
If your Windows 10 or Windows 11 built-in apps are reinstalled but still do not work correctly, you should try one more thing before losing hope: run the Windows Store Apps, troubleshooter.
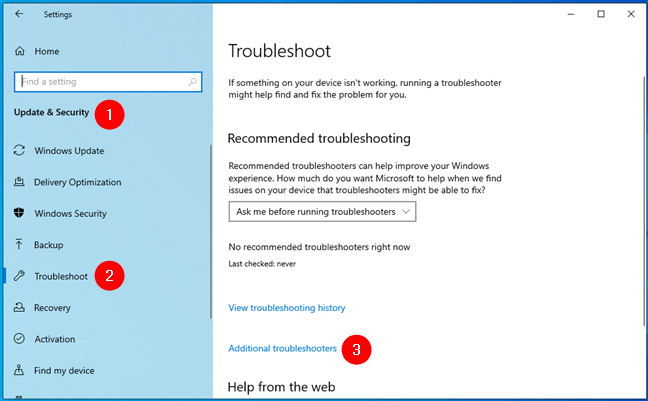
On Windows 10, open the Settings app (Windows + I), head to Update & Security > Troubleshoot, and click or tap Additional troubleshooters on the right.
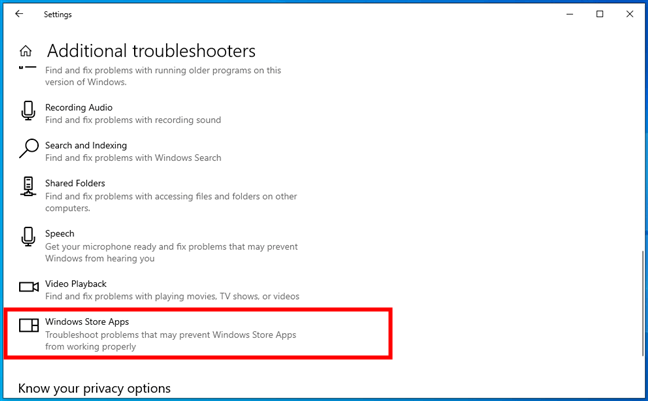
Then, scroll down to the end of the list and click or tap on Windows Store Apps.
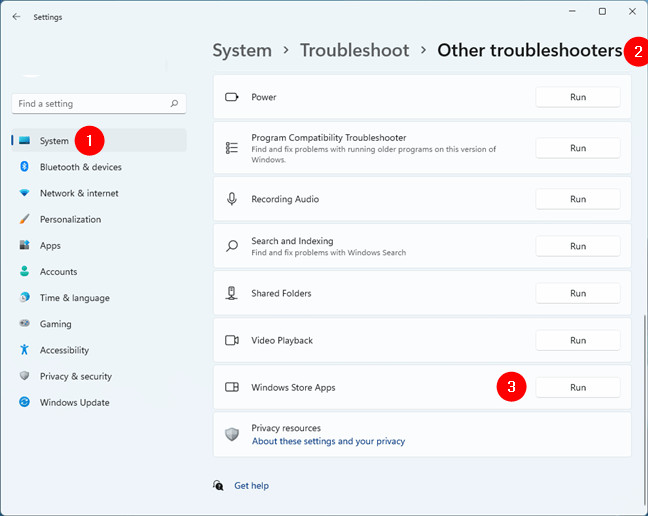
In Windows 11, launch Settings (Windows + I) and navigate to System > Troubleshoot > Other troubleshooters. Then, scroll down, and you’ll find the Windows Store Apps troubleshooter towards the end of the list. When you do, click or tap the Run button to its right.
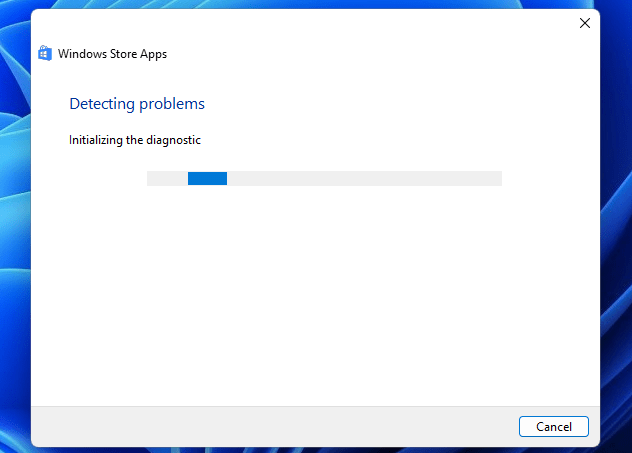
Whether you’re using Windows 10 or Windows 11, once you start the Windows Store Apps troubleshooter, it will begin to detect potential problems.
If it finds anything that could affect how the Windows apps run on your PC, it makes the necessary repairs. When that process is done, it might ask you to reboot your Windows 10 or Windows 11 computer or device. If that happens, restart it and check whether your apps are working correctly. If they still don’t, we’re sorry, but the best thing you can do is reset or reinstall each app on its own or even try resetting Windows altogether.
Did you reinstall Windows apps with PowerShell?
As you can see, bringing back all the Windows 10 or Windows 11 default apps is easy, at least in theory. Furthermore, it shouldn’t take too long. After all, it’s all about running just one PowerShell command. However, as with all things in life, it might not go as planned, and, in some cases, Windows can fail to reinstall its standard apps. So, do you know other ways to get the built-in apps back into Windows 10 or Windows 11? Don’t hesitate to let us know in the comments section below.
