In this tutorial, we will learn How to Schedule Python Script Using Windows Task Scheduler?
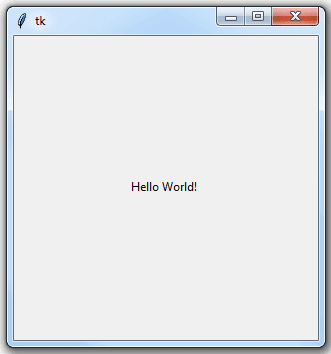
To show you how the process works, I’ll use a simple example that will display ‘Hello World!’ each day at 6 AM.
Steps to Schedule Python Script using Windows Scheduler
Step 1: Prepare the Python Script
In our example, I’ll use the Tkinter module to display the label of ‘Hello World!.’
Alternatively, you may use any Python script that you’d like to schedule.
Here is the Python script that I used:
import tkinter as tk
root= tk.Tk()
canvas1 = tk.Canvas(root, width = 300, height = 300)
canvas1.pack()
label1 = tk.Label(root, text='Hello World!')
canvas1.create_window(150, 150, window=label1)
root.mainloop()
Step 2: Save the Python Script
Once you’re done writing the script, save it as a Python file (which should have the .py file type):
In my case, I saved the Python script on my Desktop, under this path:
C:\Users\myTechMint\Desktop\Hello_World.py
Step 3: Create Batch File to Run the Python Script
Next, you’ll need to create a batch file to run the Python script.
To start, open Notepad, and then apply the following generic structure:
"Path where your Python exe is stored\python.exe" "Path where your Python script is stored\script name.py"
pause
In my case:
- Path where my Python exe is stored\python.exe is:
“C:\Users\myTechMint\AppData\Local\Programs\Python\Python37-32\python.exe” - Path where my Python script is stored\script name.py is (from step 2):
“C:\Users\myTechMint\Desktop\Hello_World.py”
You’ll need to adjust those paths to fit your instances.
“C:\Users\myTechMint\AppData\Local\Programs\Python\Python37-32\python.exe” “C:\Users\myTechMint\Desktop\Hello_World.py”
pause
Here is a glance of how my Notepad would look like after adding the paths:
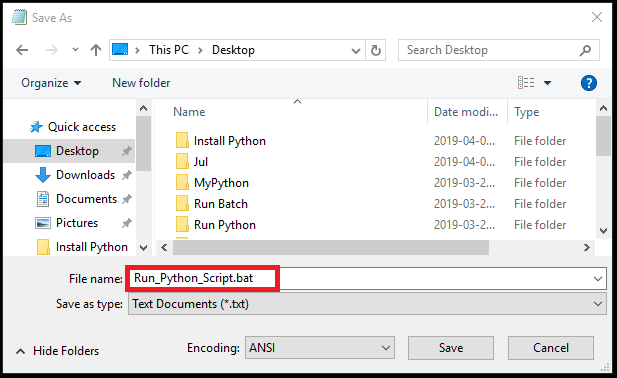
Finally, save the Notepad with your file name and the “bat” extension:
file name.bat
For example, I decided to save the Notepad on my Desktop as:
Run_Python_Script.bat
Once I saved the Notepad, a new batch file (called Run_Python_Script) got created on my desktop:
This batch file will run the Python script when double-clicking on it:
In the final step below, you’ll see how to schedule that batch file to execute the Python Script using the Windows Scheduler.
Step 4: Schedule the Python Script using Windows Scheduler
For this step, I’m going to use Windows 10 to execute the Python Script via the Windows Scheduler. Similar principles would apply when using previous versions of Windows.
First, open the Control Panel and then click on the Administrative Tools:
Select and double-click on the Task Scheduler icon as shown above or you can open Task Scheduler directly from CMD by typing command “control schedtasks” and hitting Enter.
Once Task Scheduler is opened, and then choose the option to ‘Create Basic Task…’
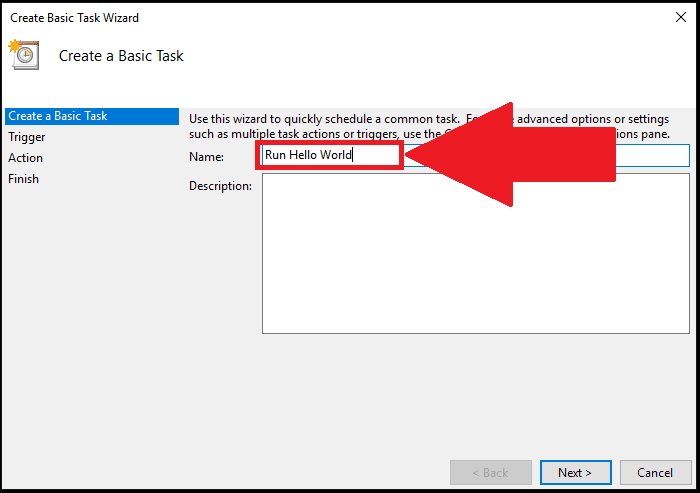
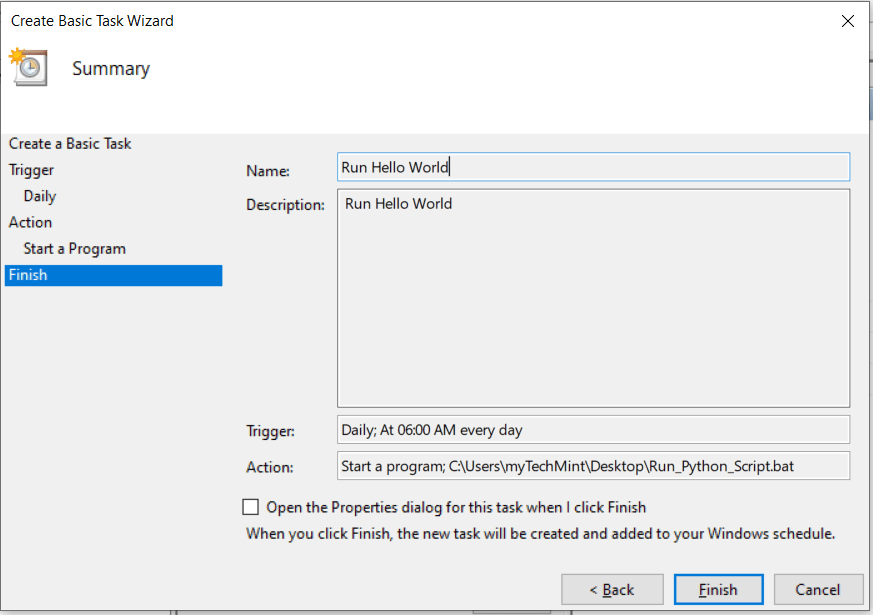
Type a name for your task (you can also type a description if needed), and then press Next.
Here, I named the task as Run Hello World
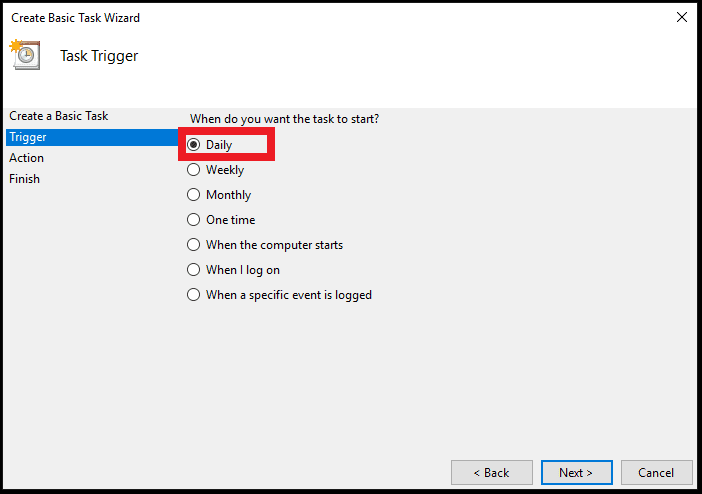
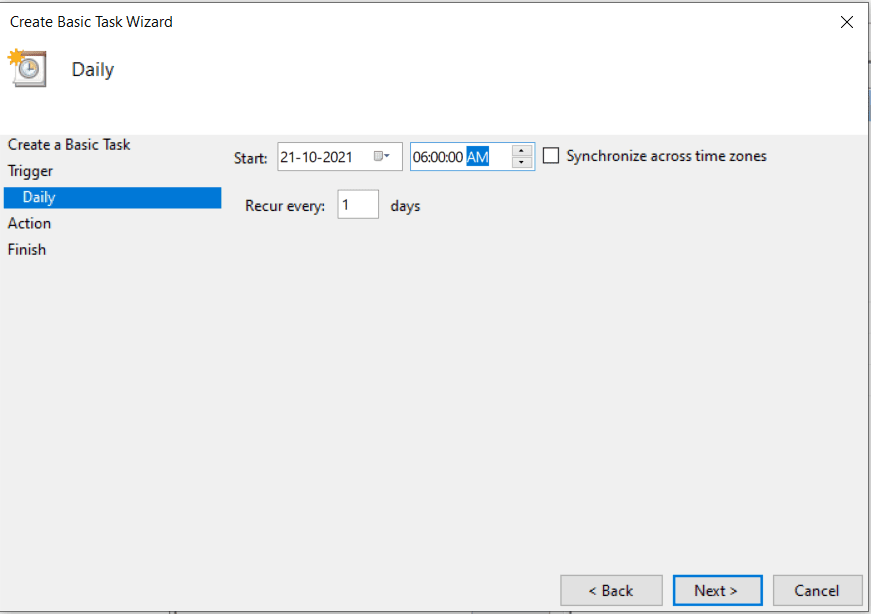
Next, I chose to start the task ‘Daily’ since we wish to run the Python script daily at 6 AM:
The action will then recur every day at 6 AM, starting from 21-10-2021. You can adjust those timing parameters to suit your needs.
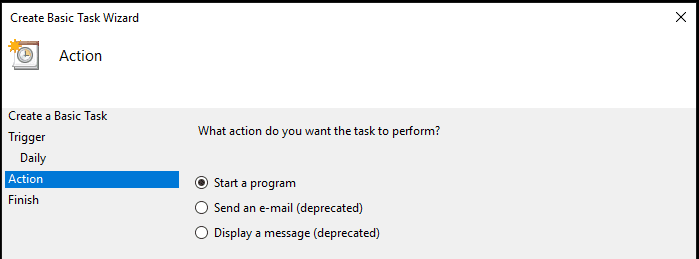
Select, Start a program, and then press Next:
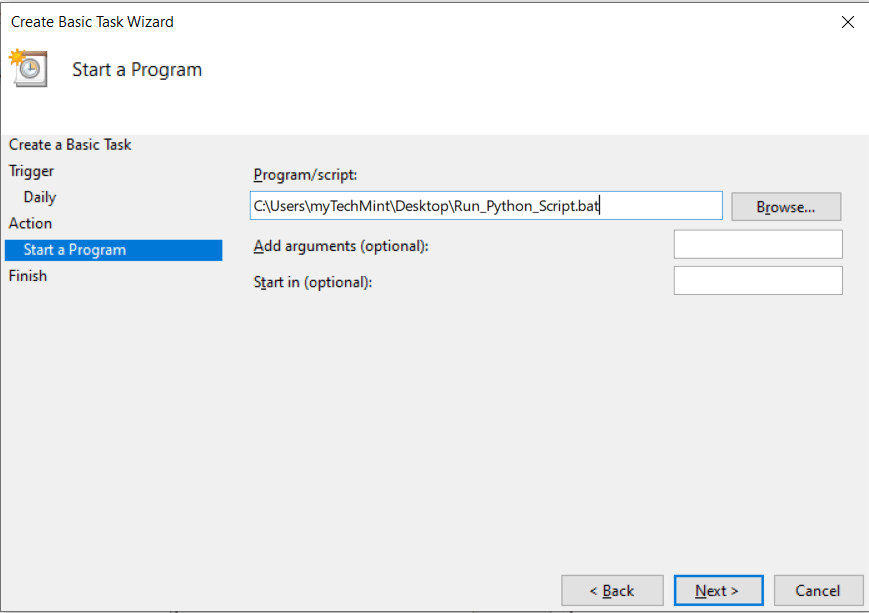
Next, use the Browse button to find the batch file that runs the Python script. In my case, I placed the Run_Python_Script batch file on my Desktop:
Finally, click on Finish, and you should be good to go:
From this point onward, you’ll be greeted with ‘Hello World!’ every day at 6 AM:
That’s it, now we know How to Schedule Python Script Using Windows Task Scheduler. Feel free to use the comment section for any suggestions and doubts 😎


