One of the simple but useful tools that come in-built with the Windows operating system is Calculator. By default, the simple mode is enabled for the Calculator app for normal users and the hamburger menu offers options to enable other modes.
However, there’s also a Graphing Mode, which is quite useful for students. It can be used to plot equations on the graph, add equations with variables, and analyze equations by hovering the cursor over key points, among others.
With the Windows 10 build 19546 or later, users can enable or disable the Graphing Mode for the Calculator from the system. In this step-by-step guide, we will show you how to enable the Calculator Graphic Mode using the Local Group Policy Editor on your Windows 10 PC. You can use the same method to disable this mode as well.
Enable Calculator Graphing Mode in Windows 10
Step 1: First of all, open the Local Group Policy Editor on your Windows 10 computer. For this, press Windows + S keys on your keyboard, and in the search box, type in “gpedit” and then hit Enter.
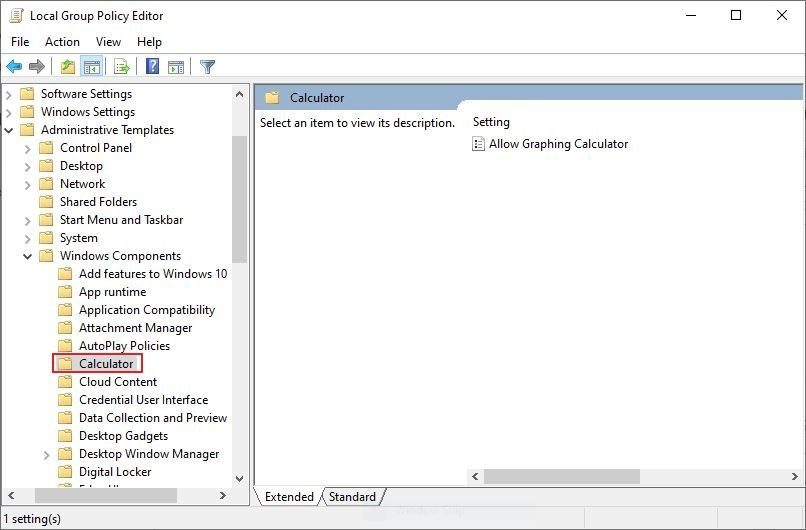
Step 2: Now, go to the following location:
User Configuration > Administrative Template > Windows Components > Calculator
Step 3: Double-click on the Allow Graphing Calculator policy.
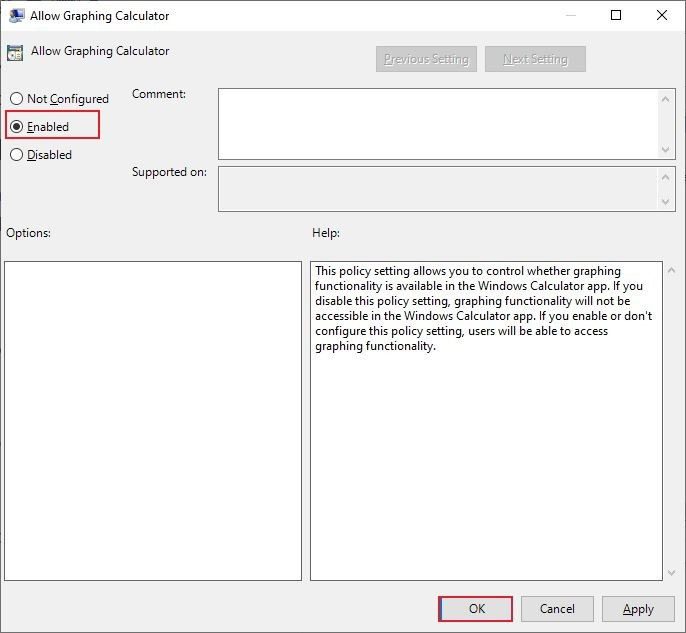
Step 4: To enable the Calculator Graphing Mode, select the “Enabled” option, and then click the “Ok” button.
After making the change, just restart your computer for the changes to take effect. Once that is done, the Calculator Graphing Mode will be enabled on your Windows 10 system.


